Interview slots can be created and managed within an Interviewing stage by assigned standard users or hiring managers. Once created, applicants can be assigned to interview slots manually or invited to select from available slots.
There are two methods available for creating interview slots:
- Schedule Wizard - Recommended when creating multiple interview slots at once.
- Interview Calendar - Ideal for creating individual interview slots on specific dates and times.
Step 1: Access Interviewing
Select Interviewing under Applicant Tracking on the admin portal.
This will display a list of jobs that currently have applicants within the Interviewing stage. To create and manage interview slots, select the three dots under the Actions column and choose Start/Resume against the required job.

Method 1: Create Interview Slots Using the Schedule Wizard
The Schedule Wizard is the recommended option when multiple interview slots need to be created at once.
Step 2: Open the Schedule Wizard
From within the Interviewing stage, select Schedule Wizard.
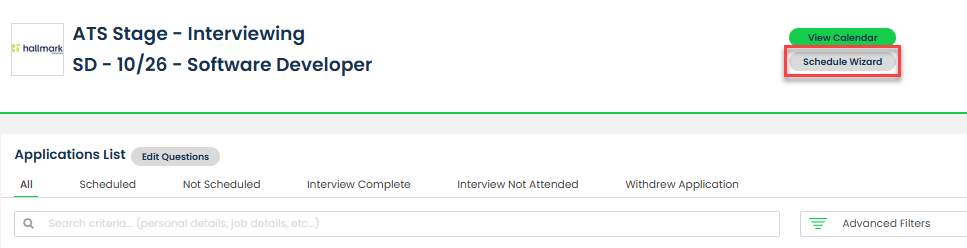
Step 3: Configure the Interview Schedule
Complete the following fields: Start Date, End Date, Start Time, End Time. Duration, Break Duration, Lunch Break Start, Lunch Break End, Location, Days, and Maximum Number of Timeslots.
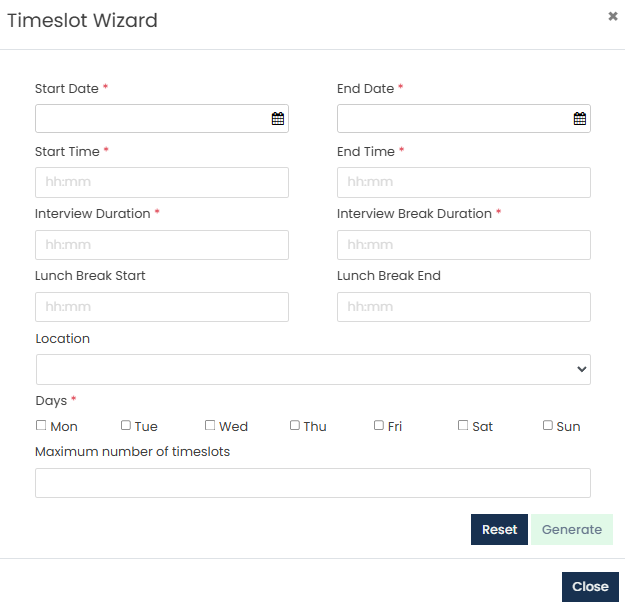
Once all required details have been entered, select Generate.
The system will automatically generate interview slots based on the criteria entered.
Step 4: Review the Generated Slots
A list of generated interview slots will be displayed.
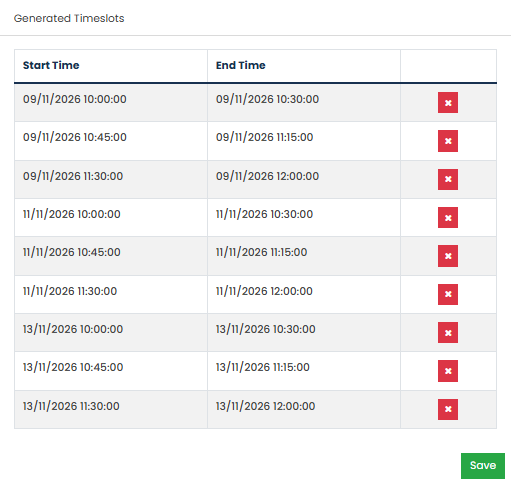
If any slots are not required, select the X beside the relevant slot to remove it.
Once you are satisfied with the generated schedule, select Save.
Method 2: Create Interview Slots Using the Calendar
The calendar can be used when creating individual interview slots for specific applicants, dates, or times.
Step 2: Open the Interview Calendar
The calendar can be accessed by:
- Selecting View Calendar from the Interviewing stage, or
- Selecting Schedule Now against a specific applicant
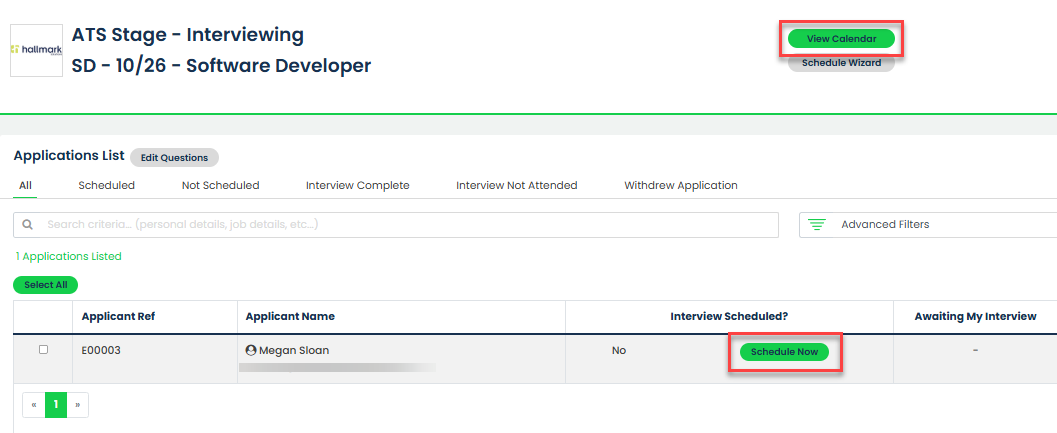
Step 3: Navigate to the Required Date and Time
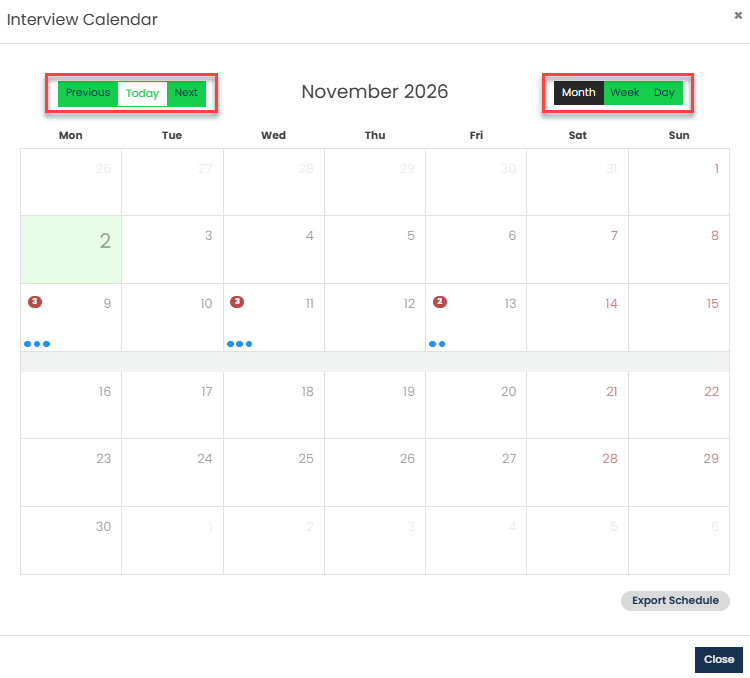
Use the Week or Day view options in the top-right corner of the calendar.
Use the Previous, Today, and Next buttons to navigate to the required date.
Step 4: Create the Interview Slot
Select the required time slot within the calendar.
A pop-up window will appear allowing you to complete the interview slot details.
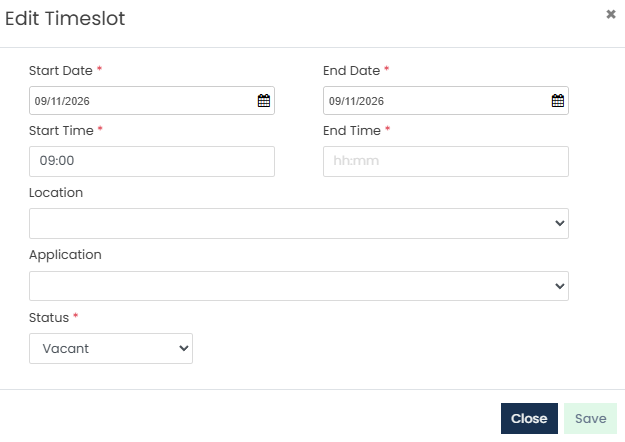
Enter the End Time, Location, Applicant, and Applicant Status.
Once completed, save the interview slot.
Was this article helpful?
That’s Great!
Thank you for your feedback
Sorry! We couldn't be helpful
Thank you for your feedback
Feedback sent
We appreciate your effort and will try to fix the article